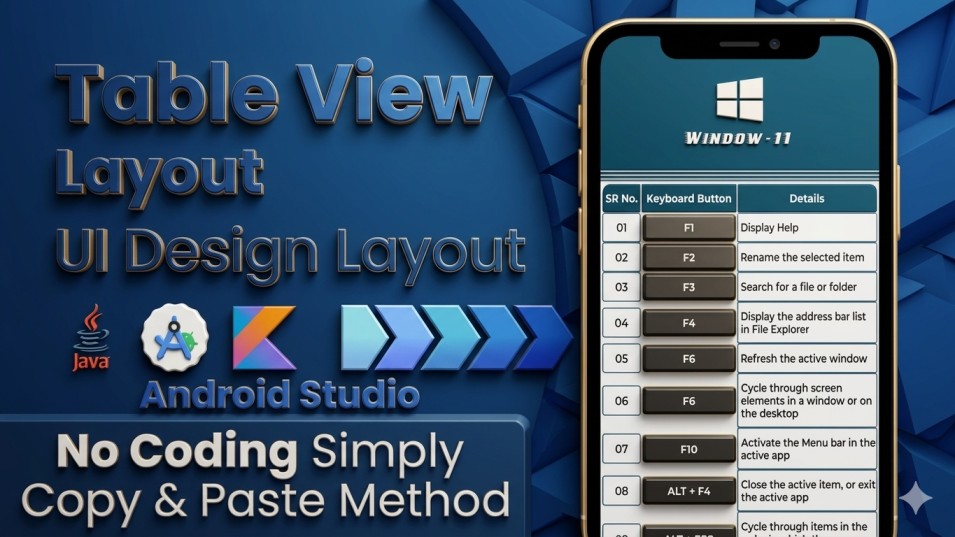
In this blog, we have to create a table layout to show details in an arranged view in Android Studio. We will provide the latest code UI/UX layout for the user, reliable for the Android App.
Before creating a project, we have provided some assets to make this project development purpose.
- Implement the App Color Code in the “colors.xml” file.
Here, we have to insert the color code, which will help to customise your application project.
<color name="purple_200">#00425A</color>
    <color name="purple_500">#00425A</color>
    <color name="purple_700">#00425A</color>
    <color name="teal_200">#F5F6FA</color>
    <color name="teal_700">#F5F6FA</color>
    <color name="black">#28282b</color>
    <color name="white">#FFFFFFFF</color>
- Replace “Action Bar” with “No Action Bar”.
We need to replace your app toolbar/actionbar to support your app customization system.
<resources xmlns:tools="http://schemas.android.com/tools">
    <!-- Base application theme. -->
    <style name="Theme.TableLayoutExample" parent="Theme.MaterialComponents.DayNight.NoActionBar">
        <!-- Primary brand color. -->
        <item name="colorPrimary">@color/purple_500</item>
        <item name="colorPrimaryVariant">@color/purple_700</item>
        <item name="colorOnPrimary">@color/white</item>
        <!-- Secondary brand color. -->
        <item name="colorSecondary">@color/teal_200</item>
        <item name="colorSecondaryVariant">@color/teal_700</item>
        <item name="colorOnSecondary">@color/black</item>
        <!-- Status bar color. -->
        <item name="android:statusBarColor">?attr/colorPrimaryVariant</item>
        <!-- Customize your theme here. -->
    </style>
</resources>
Create a background UI Design in the “drawable” folder.
- Implement the UI design layout code “bg.xml” given below.
<?xml version="1.0" encoding="utf-8"?>
<shape xmlns:android="http://schemas.android.com/apk/res/android"
    android:shape="rectangle">

    <solid android:color="@color/purple_200" />
    <stroke
        android:width="1dp"
        android:color="@color/teal_200" />

</shape>
- Implement the UI design layout defined in “bg01.xml” below.
<?xml version="1.0" encoding="utf-8"?>
<shape xmlns:android="http://schemas.android.com/apk/res/android"
    android:shape="rectangle">

    <solid android:color="@color/teal_200" />
    <stroke
        android:width="1dp"
        android:color="@color/purple_200" />

</shape>
- Implement the UI design layout code “bg02.xml” given below.
<?xml version="1.0" encoding="utf-8"?>
<shape xmlns:android="http://schemas.android.com/apk/res/android"
    android:shape="rectangle">

    <solid android:color="@color/black" />
    <stroke
        android:width="1dp"
        android:color="@color/teal_200" />

</shape>
- Implement the UI design layout code “bg1.xml” given below.
<?xml version="1.0" encoding="utf-8"?>
<shape xmlns:android="http://schemas.android.com/apk/res/android"
    android:shape="rectangle">

    <solid android:color="@color/purple_200" />
    <stroke
        android:width="1dp"
        android:color="@color/teal_200" />
    <corners
        android:bottomLeftRadius="0dp"
        android:bottomRightRadius="0dp"
        android:topLeftRadius="12dp"
        android:topRightRadius="0dp" />

</shape>
- Implement the UI design layout code “bg.xml” given below.
<?xml version="1.0" encoding="utf-8"?>
<shape xmlns:android="http://schemas.android.com/apk/res/android"
    android:shape="rectangle">

    <solid android:color="@color/purple_200" />
    <stroke
        android:width="1dp"
        android:color="@color/teal_200" />
    <corners
        android:bottomLeftRadius="0dp"
        android:bottomRightRadius="0dp"
        android:topLeftRadius="0dp"
        android:topRightRadius="12dp" />

</shape>
- Import App “LOGO” in “drawable” folder.
We have to import an app logo into your project, which will help to show the table layout details, “LOGO” for user interface purposes only.
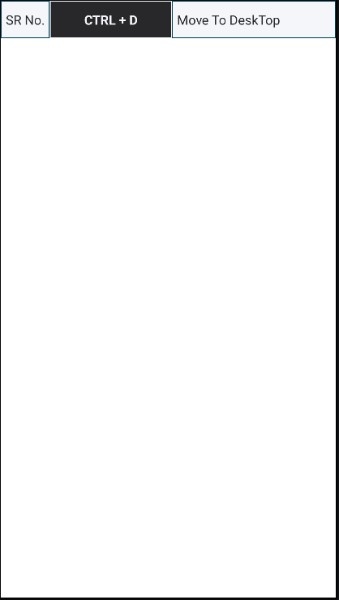
Create a “model_item_layout.xml” UI Design Layout.
Now, we have to create a UI layout design to show table content in an arranged list.
<?xml version="1.0" encoding="utf-8"?>
<TableLayout xmlns:android="http://schemas.android.com/apk/res/android"
    android:layout_width="match_parent"
    android:layout_height="wrap_content"
    android:fitsSystemWindows="true">

    <TableRow>

        <TextView
            android:id="@+id/modelSR"
            android:layout_width="60dp"
            android:layout_height="wrap_content"
            android:layout_gravity="center_vertical"
            android:background="@drawable/bg01"
            android:gravity="center"
            android:paddingTop="12dp"
            android:paddingBottom="12dp"
            android:text="SR No."
            android:textColor="@color/black"
            android:textSize="16sp" />

        <TextView
            android:id="@+id/modelKeyboard"
            android:layout_width="150dp"
            android:layout_gravity="center_vertical"
            android:background="@drawable/bg02"
            android:gravity="center"
            android:paddingTop="12dp"
            android:paddingBottom="12dp"
            android:text="ctrl + d"
            android:textAllCaps="true"
            android:textColor="@color/teal_200"
            android:textSize="16sp"
            android:textStyle="bold" />

        <TextView
            android:id="@+id/modelDetails"
            android:layout_gravity="center_vertical"
            android:layout_weight="1.0"
            android:background="@drawable/bg01"
            android:gravity="start"
            android:paddingStart="6dp"
            android:paddingTop="12dp"
            android:paddingBottom="12dp"
            android:scrollbars="vertical"
            android:text="Move To DeskTop"
            android:textColor="@color/black"
            android:textSize="16sp" />
    </TableRow>

</TableLayout>
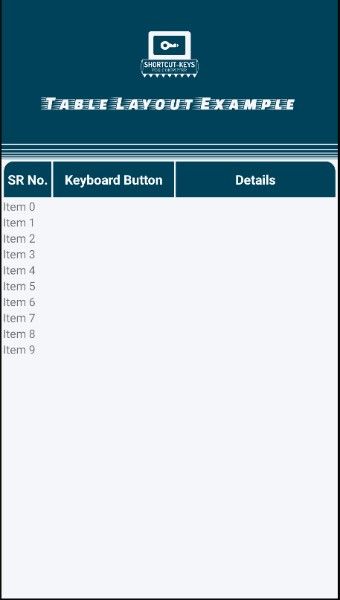
Create a “activity_main.xml” UI Design Layout.
<?xml version="1.0" encoding="utf-8"?>
<androidx.constraintlayout.widget.ConstraintLayout xmlns:android="http://schemas.android.com/apk/res/android"
    xmlns:app="http://schemas.android.com/apk/res-auto"
    xmlns:tools="http://schemas.android.com/tools"
    android:id="@+id/content_details"
    android:layout_width="match_parent"
    android:layout_height="match_parent"
    android:background="@color/purple_200"
    android:fitsSystemWindows="true"
    tools:context=".MainActivity">

    <androidx.core.widget.NestedScrollView
        android:id="@+id/nestedScrollView"
        android:layout_width="0dp"
        android:layout_height="0dp"
        android:background="@color/teal_200"
        android:scrollbars="vertical"
        app:layout_constraintBottom_toTopOf="@+id/banner_ad_container"
        app:layout_constraintEnd_toEndOf="parent"
        app:layout_constraintStart_toStartOf="parent"
        app:layout_constraintTop_toTopOf="parent">

        <LinearLayout
            android:layout_width="match_parent"
            android:layout_height="wrap_content"
            android:orientation="vertical">

            <androidx.constraintlayout.widget.ConstraintLayout
                android:layout_width="match_parent"
                android:layout_height="176dp"
                android:background="@color/purple_200">

                <ImageView
                    android:id="@+id/detailImg"
                    android:layout_width="70dp"
                    android:layout_height="70dp"
                    android:contentDescription="@string/app_name"
                    android:src="@drawable/icon"
                    app:layout_constraintBottom_toBottomOf="parent"
                    app:layout_constraintEnd_toEndOf="parent"
                    app:layout_constraintStart_toStartOf="parent"
                    app:layout_constraintTop_toTopOf="parent"
                    app:layout_constraintVertical_bias="0.3" />

                <TextView
                    android:id="@+id/detailTxt"
                    android:layout_width="wrap_content"
                    android:layout_height="wrap_content"
                    android:elevation="2dp"
                    android:fontFamily="@font/faster_one"
                    android:text="@string/app_name"
                    android:textColor="@color/teal_200"
                    android:textSize="24sp"
                    app:layout_constraintBottom_toBottomOf="parent"
                    app:layout_constraintEnd_toEndOf="parent"
                    app:layout_constraintStart_toStartOf="parent"
                    app:layout_constraintTop_toBottomOf="@+id/detailImg"
                    app:layout_constraintVertical_bias="0.2" />


            </androidx.constraintlayout.widget.ConstraintLayout>

            <View
                android:layout_width="match_parent"
                android:layout_height="4dp"
                android:layout_marginTop="1.5dp"
                android:background="@color/purple_200" />

            <View
                android:layout_width="match_parent"
                android:layout_height="3dp"
                android:layout_marginTop="1.5dp"
                android:background="@color/purple_200" />

            <View
                android:layout_width="match_parent"
                android:layout_height="2dp"
                android:layout_marginTop="1.5dp"
                android:background="@color/purple_200" />

            <View
                android:layout_width="match_parent"
                android:layout_height="1dp"
                android:layout_marginTop="1.5dp"
                android:background="@color/purple_200" />

            <View
                android:layout_width="match_parent"
                android:layout_height="0.5dp"
                android:layout_marginTop="1.5dp"
                android:background="@color/purple_200" />

            <TableLayout
                android:layout_width="match_parent"
                android:layout_height="wrap_content"
                android:layout_marginStart="2dp"
                android:layout_marginTop="2dp"
                android:layout_marginEnd="2dp">

                <TableRow>

                    <TextView
                        android:layout_width="60dp"
                        android:background="@drawable/bg1"
                        android:gravity="center"
                        android:paddingTop="12dp"
                        android:paddingBottom="12dp"
                        android:text="SR No."
                        android:textColor="@color/white"
                        android:textSize="16sp"
                        android:textStyle="bold" />

                    <TextView
                        android:layout_width="150dp"
                        android:background="@drawable/bg"
                        android:gravity="center"
                        android:paddingTop="12dp"
                        android:paddingBottom="12dp"
                        android:text="Keyboard Button"
                        android:textColor="@color/white"
                        android:textSize="16sp"
                        android:textStyle="bold" />

                    <TextView
                        android:layout_weight="1.0"
                        android:background="@drawable/bg2"
                        android:gravity="center"
                        android:paddingTop="12dp"
                        android:paddingBottom="12dp"
                        android:text="Details"
                        android:textColor="@color/white"
                        android:textSize="16sp"
                        android:textStyle="bold" />

                </TableRow>

            </TableLayout>

            <androidx.recyclerview.widget.RecyclerView
                android:id="@+id/recyclerViewSecond"
                android:layout_width="match_parent"
                android:layout_height="wrap_content"
                android:layout_marginStart="2dp"
                android:layout_marginEnd="2dp" />

        </LinearLayout>

    </androidx.core.widget.NestedScrollView>

    <LinearLayout
        android:id="@+id/banner_ad_container"
        android:layout_width="match_parent"
        android:layout_height="wrap_content"
        android:orientation="vertical"
        app:layout_constraintBottom_toBottomOf="parent"
        app:layout_constraintEnd_toEndOf="parent"
        app:layout_constraintStart_toStartOf="parent" />

</androidx.constraintlayout.widget.ConstraintLayout>
Implement a “Model.java” File.
public class Model {
    String sr;
    String keyboard;
    String details;

    public Model(String sr, String keyboard, String details) {
        this.sr = sr;
        this.keyboard = keyboard;
        this.details = details;
    }

    public String getSr() {
        return sr;
    }

    public String getKeyboard() {
        return keyboard;
    }

    public String getDetails() {
        return details;
    }
}
Implement a “MyAdapter.java” File.
public class MyAdapter extends RecyclerView.Adapter<MyAdapter.ViewHolder> {

    Context context;
    List<Model> model_list;

    public MyAdapter(Context context, List<Model> model_list) {
        this.context = context;
        this.model_list = model_list;
    }

    @NonNull
    @Override
    public ViewHolder onCreateViewHolder(@NonNull ViewGroup parent, int viewType) {
        View view = LayoutInflater.from(context).inflate(R.layout.model_item_layout, parent, false);
        return new ViewHolder(view);
    }

    @Override
    public void onBindViewHolder(@NonNull ViewHolder holder, int position) {
        if (model_list != null && model_list.size() > 0) {
            Model model = model_list.get(position);
            holder.modelSR.setText(model.getSr());
            holder.modelKeyboard.setText(model.getKeyboard());
            holder.modelDetails.setText(model.getDetails());
        } else {
            return;
        }

    }

    @Override
    public int getItemCount() {
        return model_list.size();
    }

    public static class ViewHolder extends RecyclerView.ViewHolder {
        TextView modelSR, modelKeyboard, modelDetails;

        public ViewHolder(@NonNull View itemView) {
            super(itemView);

            modelSR = itemView.findViewById(R.id.modelSR);
            modelKeyboard = itemView.findViewById(R.id.modelKeyboard);
            modelDetails = itemView.findViewById(R.id.modelDetails);
        }
    }
}
Implement a “MainActivity.java” File.
Implement Variable Code in the Java File.
RecyclerView recyclerView;
    MyAdapter adapter;
Implement the ToolBar/ActionBar layout in the Java File.
ImageView imageView = findViewById(R.id.detailImg);
        TextView textView = findViewById(R.id.detailTxt);

        imageView.setImageResource(R.drawable.icon);
        textView.setText("Android - Studio");
Now, connect the RecyclerView with the Table Layout to show data.
recyclerView = findViewById(R.id.recyclerViewSecond);
        setRecyclerView();
Now, set the Recycler View Size, which is used as Fixed Size.
private void setRecyclerView() {
        recyclerView.setHasFixedSize(true);
        recyclerView.setLayoutManager(new LinearLayoutManager(this));
        adapter = new MyAdapter(this, getList());
        recyclerView.setAdapter(adapter);

    }
Finally, we can implement all the table layout content that can show users.
private List<Model> getList() {
        List<Model> model_list = new ArrayList<>();
        model_list.add(new Model("01", "Alt + 1", "Project"));
        model_list.add(new Model("02", "Alt + 9", "Version Ctrl"));
        model_list.add(new Model("03", "Shift + F10", "Run"));
        model_list.add(new Model("04", "Shift + F9", "Debug"));
        model_list.add(new Model("05", "Alt + 6", "Logcat"));
        model_list.add(new Model("06", "Esc", "Return to Editor"));
        model_list.add(new Model("07", "Ctrl + Shift + F12", "Hide All Tool Windows"));
        model_list.add(new Model("08", "Ctrl + Space", "Basic Completion"));
        model_list.add(new Model("09", "Ctrl + Shift + Space", "Smart Completion"));
        model_list.add(new Model("10", "Ctrl + Shift + Enter", "Statement Completion"));
        return model_list;
    }